
Table of Contents
Introduction
Managing multiple domains efficiently is crucial for businesses and individuals with an online presence. The Plesk-control panel is a powerful and user-friendly tool that simplifies the process of domain management. Whether you’re hosting a website, setting up email services, or configuring DNS settings, Plesk provides an intuitive interface to streamline these tasks. This guide will walk you through the steps to add a new domain in Plesk, ensuring you can manage your web assets with ease and precision.
Log in to Plesk Control Panel
Access your Plesk control panel by navigating to your server’s Plesk login page. Enter your username and password to log in.

Navigate to the Websites & Domains
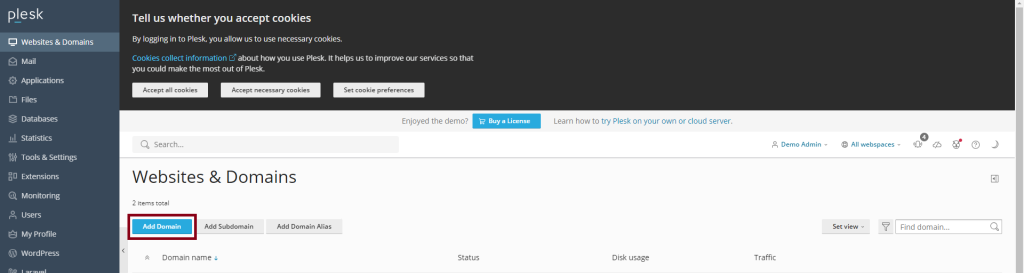
Once logged in, locate and click on the “Websites & Domains” tab from the left sidebar.

Add a New Domain
Click on the “Add Domain” button.
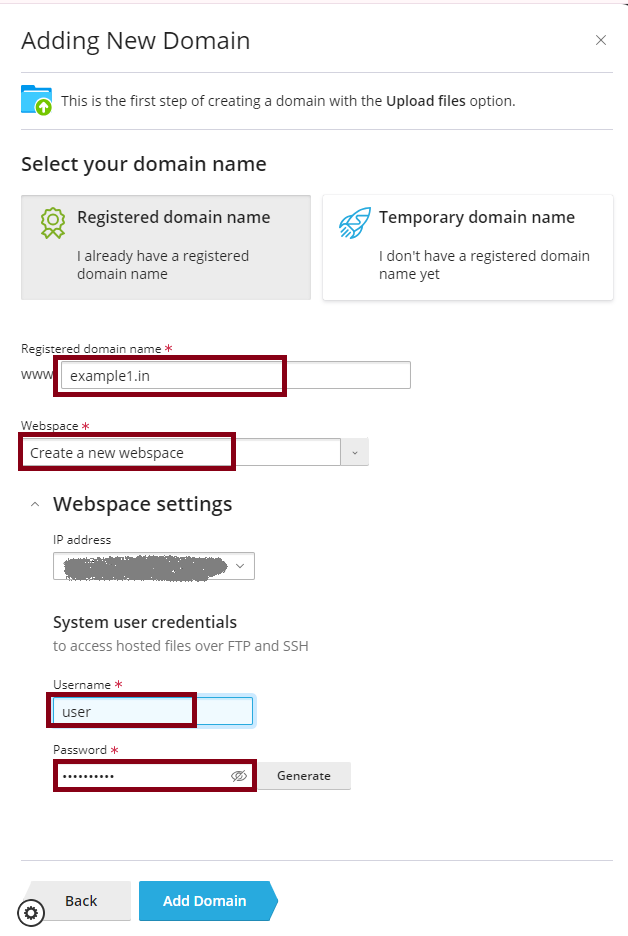
Enter Domain Details:
- Domain Name: Enter the domain name you want to add.
- Hosting Type: Choose the type of hosting you want to set up for this domain (e.g., Website Hosting, Forwarding, No Hosting).
- Website Hosting: If you want to host a website on this domain.
- Forwarding: If you want to forward this domain to another URL.
- No Hosting: If you don’t want to host any site or forward it but still want to manage DNS or mail services.
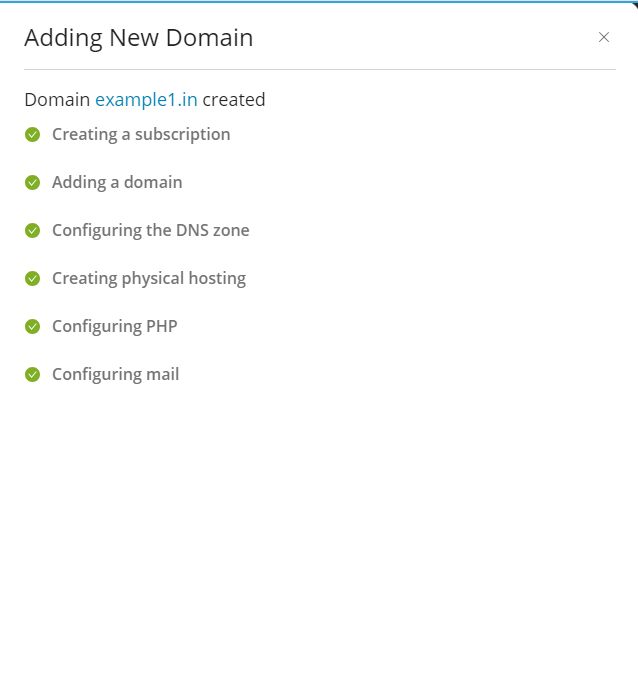

Now the Domain was added successfully to your Plesk-control panel.
Configure Hosting Settings (if you chose Website Hosting)
- Document Root: Specify the directory where the website’s files will be stored. Plesk will usually fill this in with a default value based on the domain name.
- Username: Set the FTP/SSH username for accessing the domain’s files.
- Password: Create a password for the FTP/SSH user.
- Enable Web Scripting and Statistics: Enable/disable scripting languages (PHP, ASP.NET, etc.) and web statistics for this domain.
Advanced Settings (Optional)
If you have specific requirements for SSL/TLS certificates, PHP settings, or other advanced configurations, you can set these up now. These settings can also be adjusted later.
Click OK
After entering all the necessary details, click the “OK” button to create the domain.
Verify Domain Addition
Once the process is complete, you should see the new domain listed under “Websites & Domains.” You can now manage this domain’s hosting settings, files, databases, email accounts, and other configurations from the Plesk control panel.
Additional Configurations
- DNS Settings: You may need to configure DNS settings for your domain to point it to the Plesk server. Email Accounts: Set up email accounts for your domain if needed. SSL/TLS: Install an SSL certificate to secure your domain.
By following these steps, you should be able to successfully add and manage a new domain in Plesk. If you encounter any issues, consult the Plesk documentation or seek support from your hosting provider.
Conclusion
Adding a new domain in Plesk is a straightforward process that empowers you to manage your web assets effectively. By following the steps outlined in this guide, you can seamlessly add and configure domains, ensuring they are set up according to your specific requirements. Plesk’s robust features and user-friendly interface make it an ideal choice for domain management, providing the tools you need to maintain and grow your online presence with confidence. Should you need further assistance, Plesk’s comprehensive documentation and your hosting provider’s support services are valuable resources to ensure a smooth experience.